Pearl Powder Starterkit - Epoxy Pigment Powders

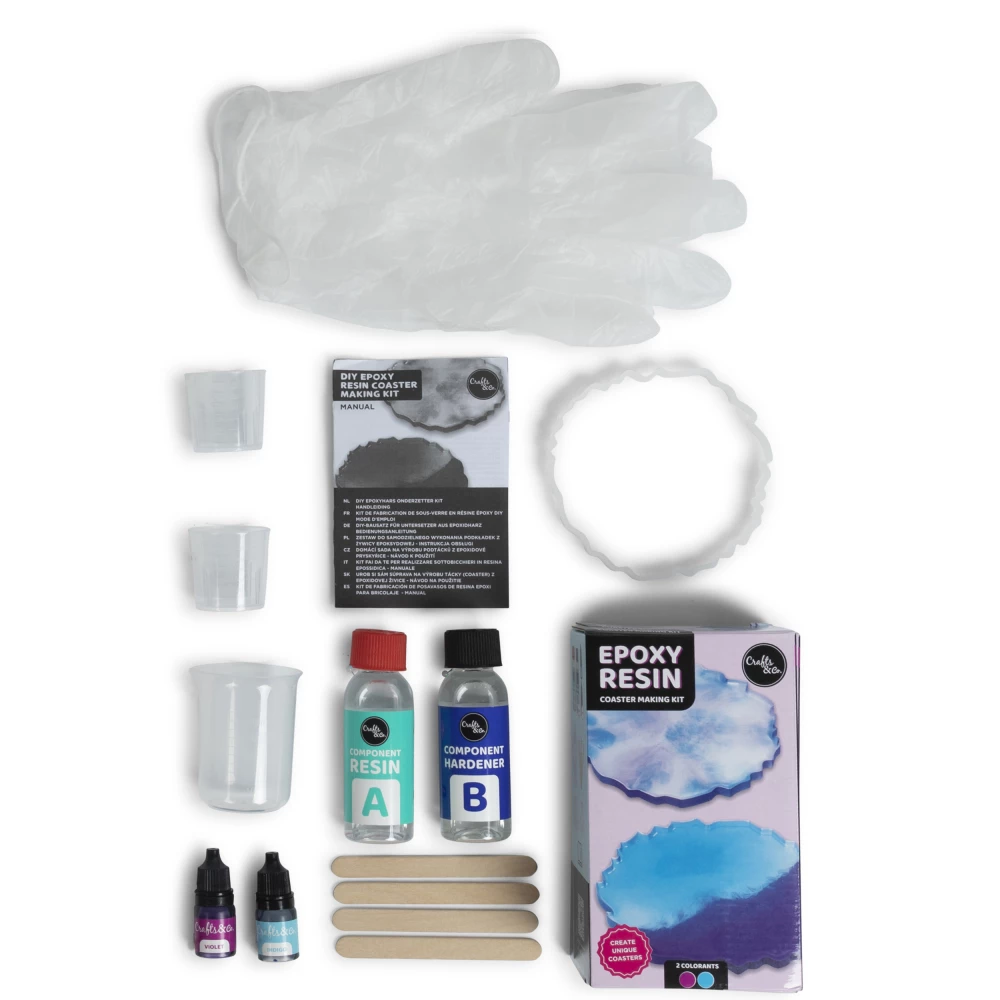
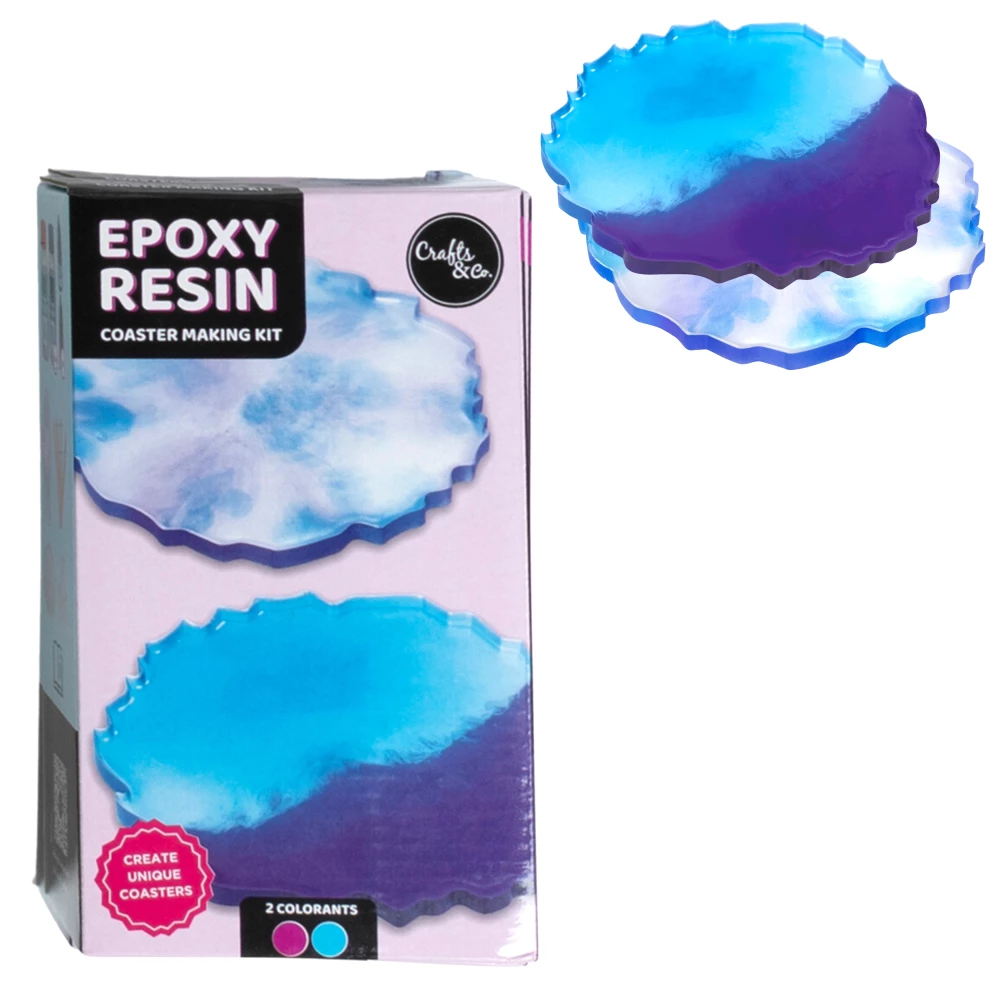

DIY kit to make fun and unique coasters from epoxy resin. Suitable for beginners and experts. Why settle for boring coasters when you can create your own unique designs? Experience the fun of crafting while upgrading your interior at the same time!
Coasters might not be at the top of your list when you think of renewing or upgrading your interior. But how chic is it when you can serve your guests a cup of coffee on a homemade epoxy resin masterpiece? If you create them yourself with epoxy resin and all possible colors and effects, these coasters are truly an eyecatcher!
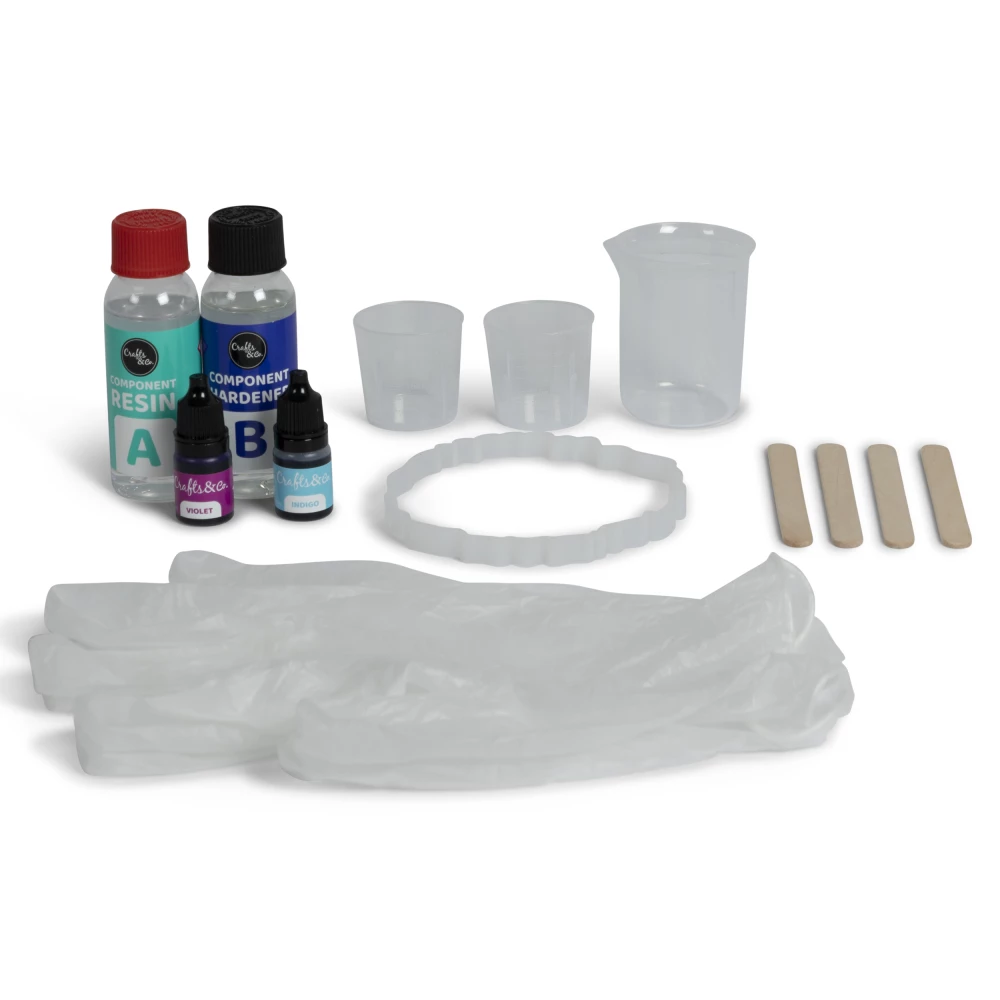
Thanks to this DIY Kit you don't have to reinvent the wheel yourself: a child can do the laundry. This kit includes everything you need including clear instructions. So you can get started right away, and it's a lot of fun too.
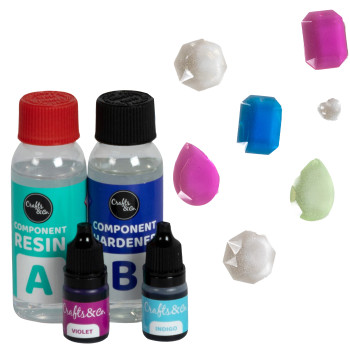
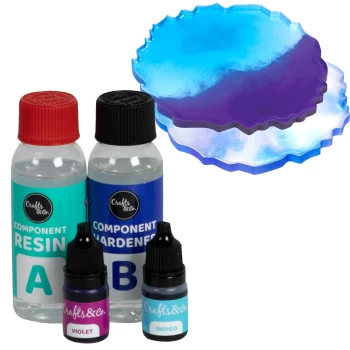
Epoxy resin is like magic! When you mix two special components called resin and hardener, it creates a super-strong material that can be used for all sorts of amazing things. With this magical material, you can create shiny floors, beautiful jewelry and even cool sculptures. The possibilities are endless!
This DIY kit includes two different colors of pigment, so your coasters can be transformed into vibrant, eye-catching works of art. Create beautiful combinations with the 2 colors:
Choose between a bold half-and-half design or a softer, more subtle tie-dye effect. The amount of dye you add is entirely up to you. Whether you're a fan of bold and bright shades or prefer a more subtle look, you can adjust the color to perfectly match your style.
But there are many, many more options to personalize your coasters. Besides pigment, you can also work with many other components. For example, try mixing some Colored glitter with the resin! This is a very easy addition with shimmering results!
Or if you really want to take things up a notch, you can infuse things. Think of a dried flower or maybe your favorite photo, incorporate it into a coaster! First pour a thin layer of resin into the mold, carefully place the dried flower or photo on top, then fill the mold completely with the resin mixture. An easy modification with a super cute result.

Pour the right amount of epoxy resin into a measuring cup.
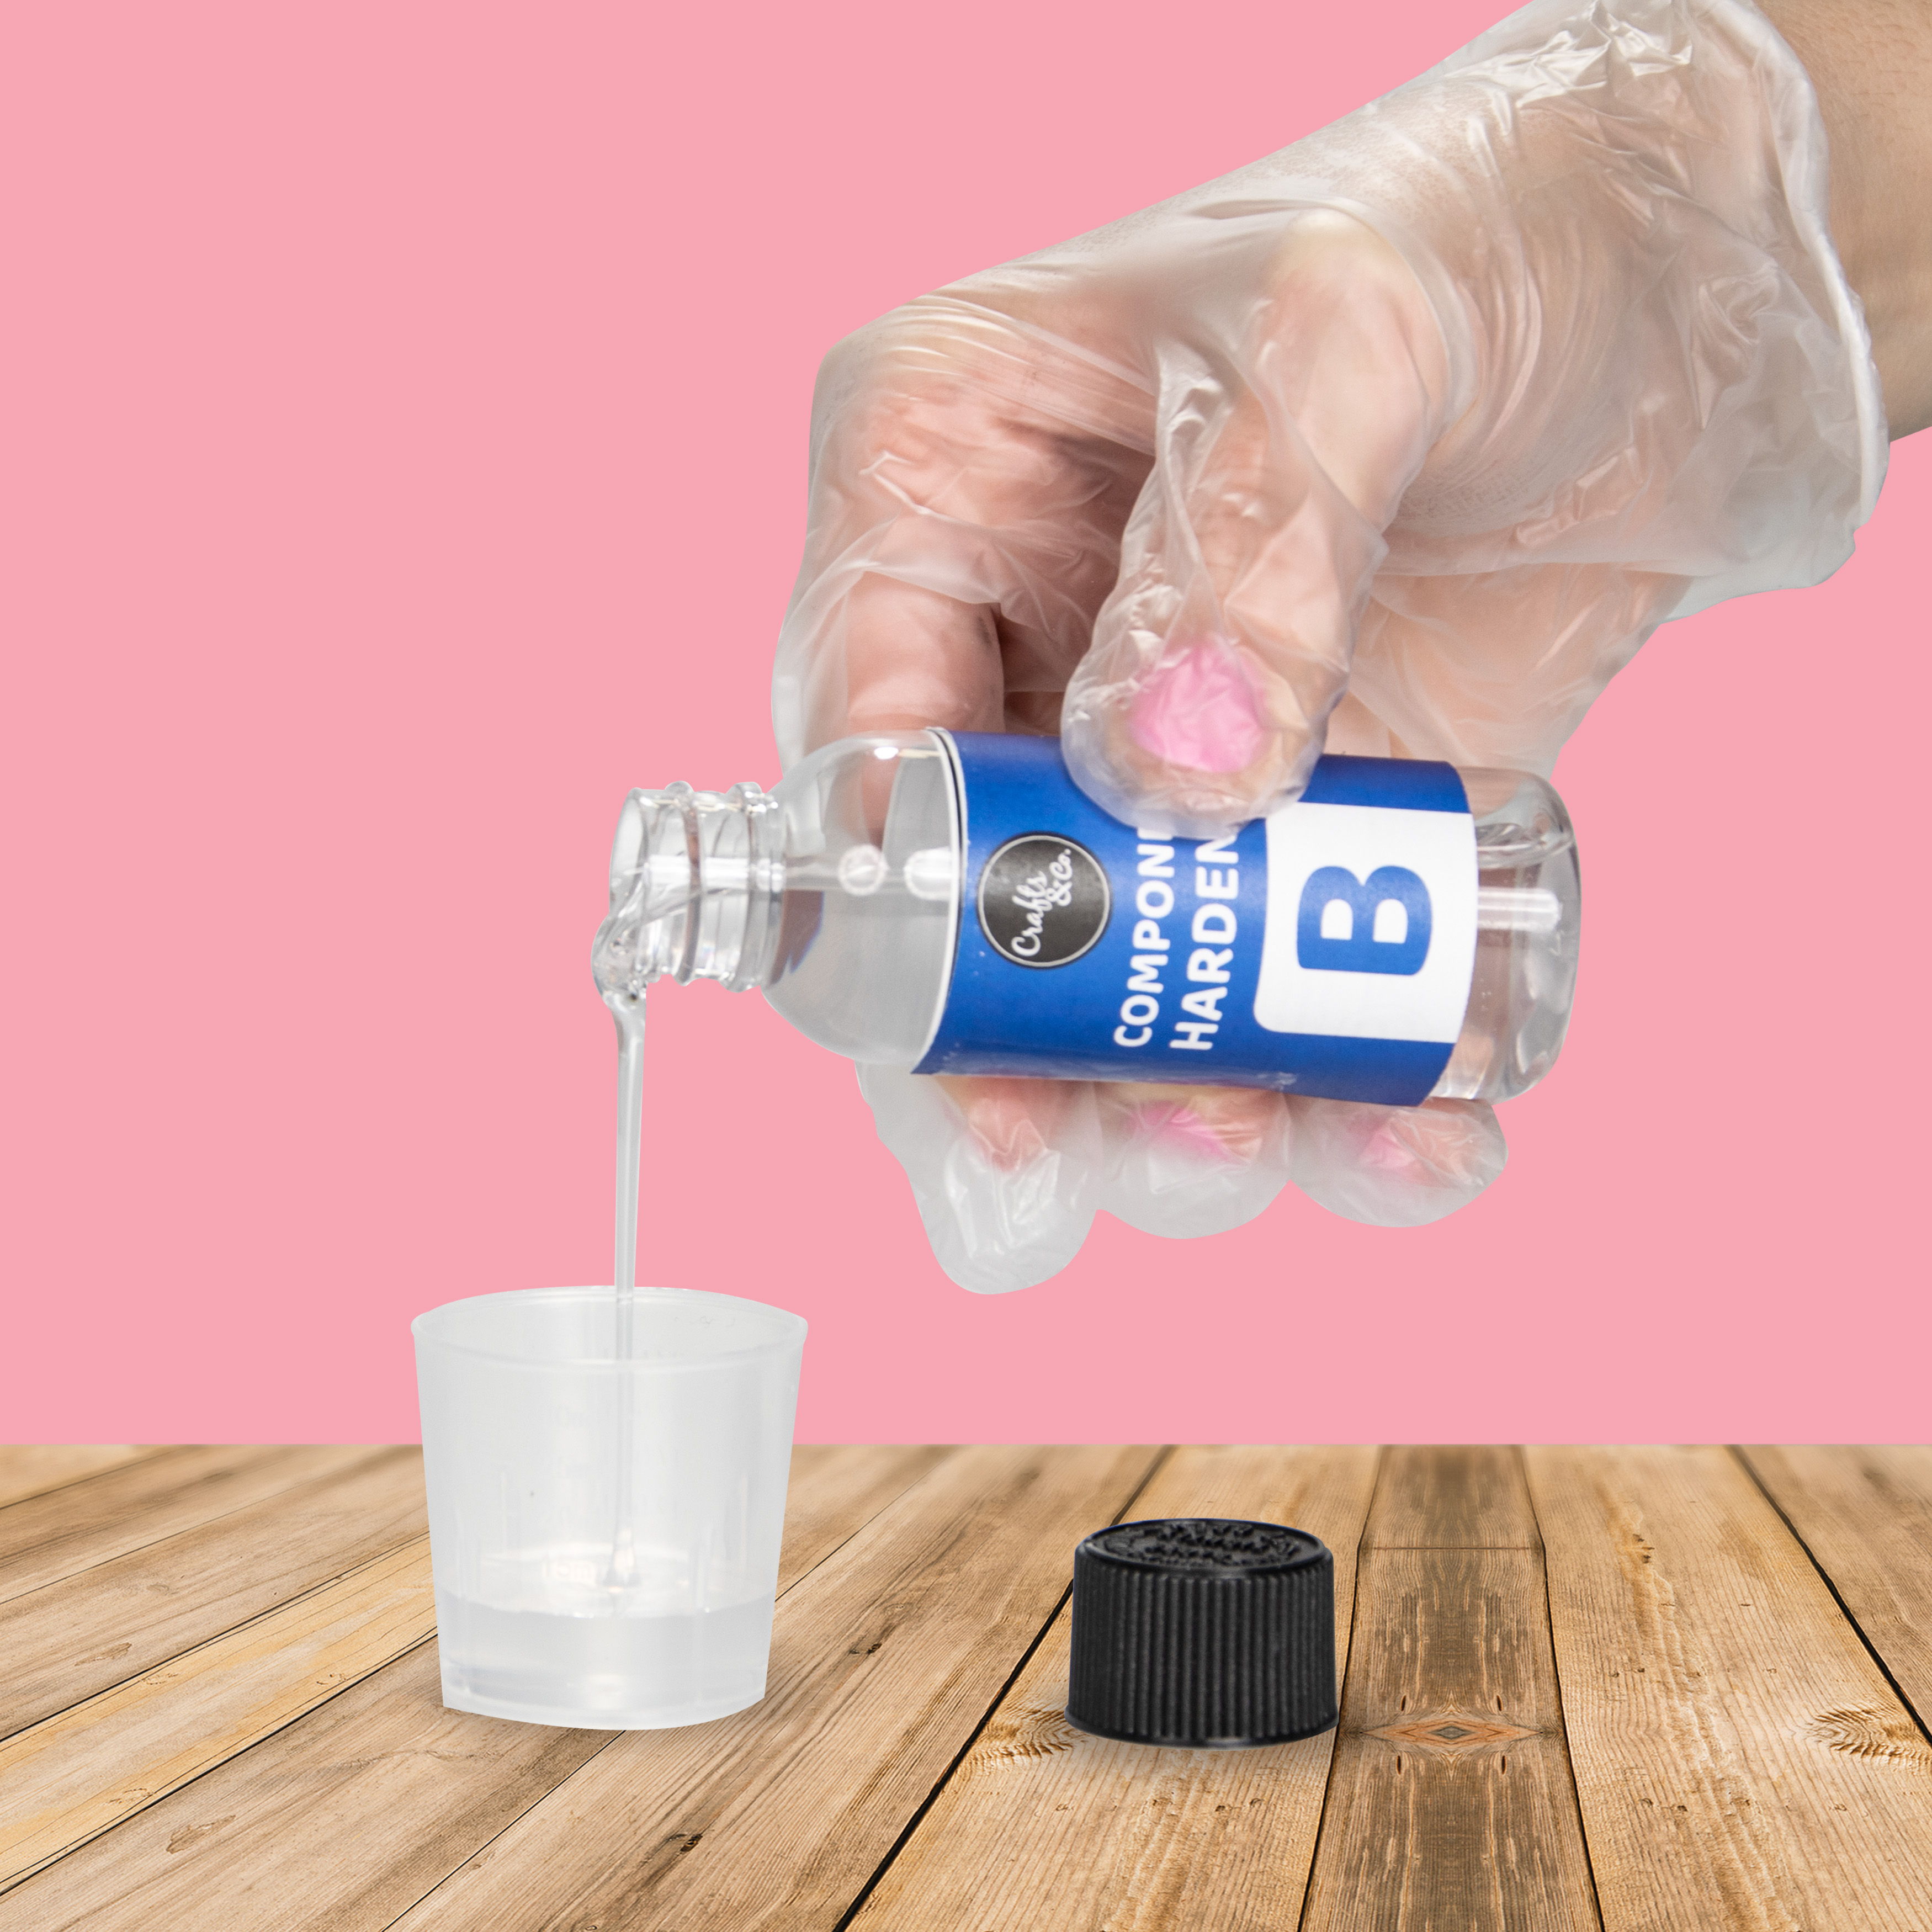
Also pour the right amount of epoxy hardener into another measuring cup.
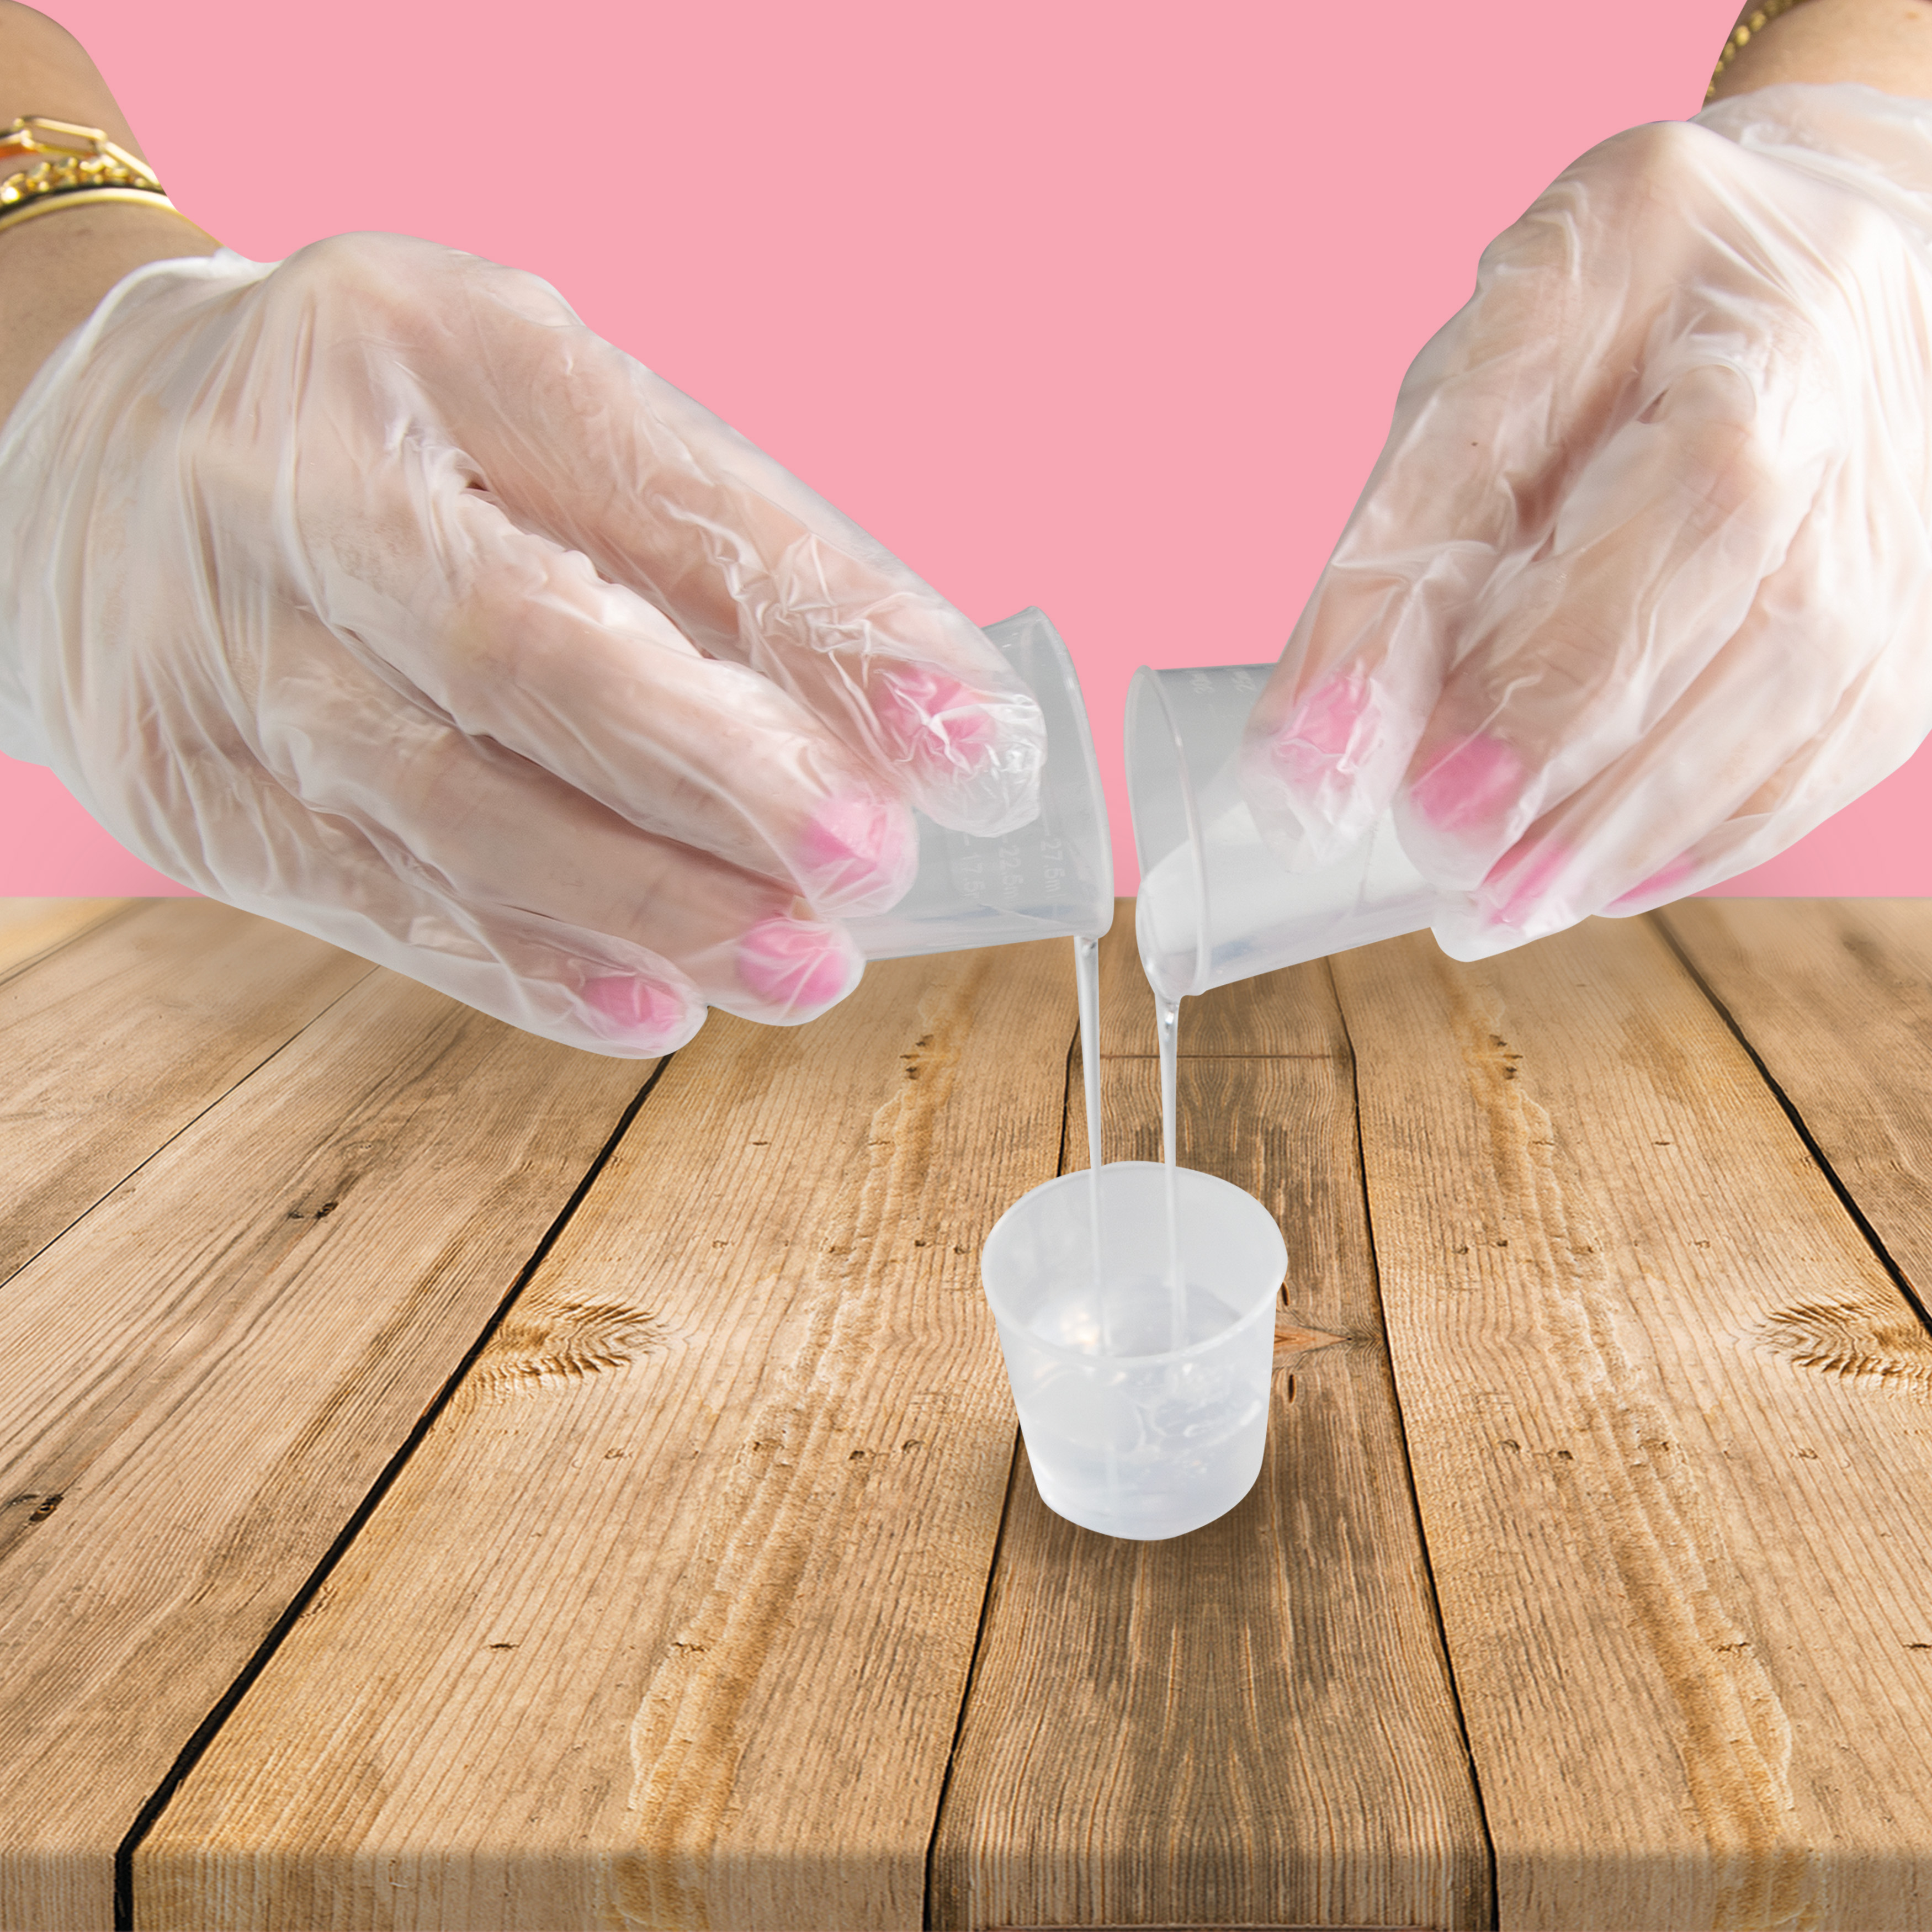
Pour both measuring cups into the mixing cup.
Try to pour the units together slowly so that no air bubbles form!
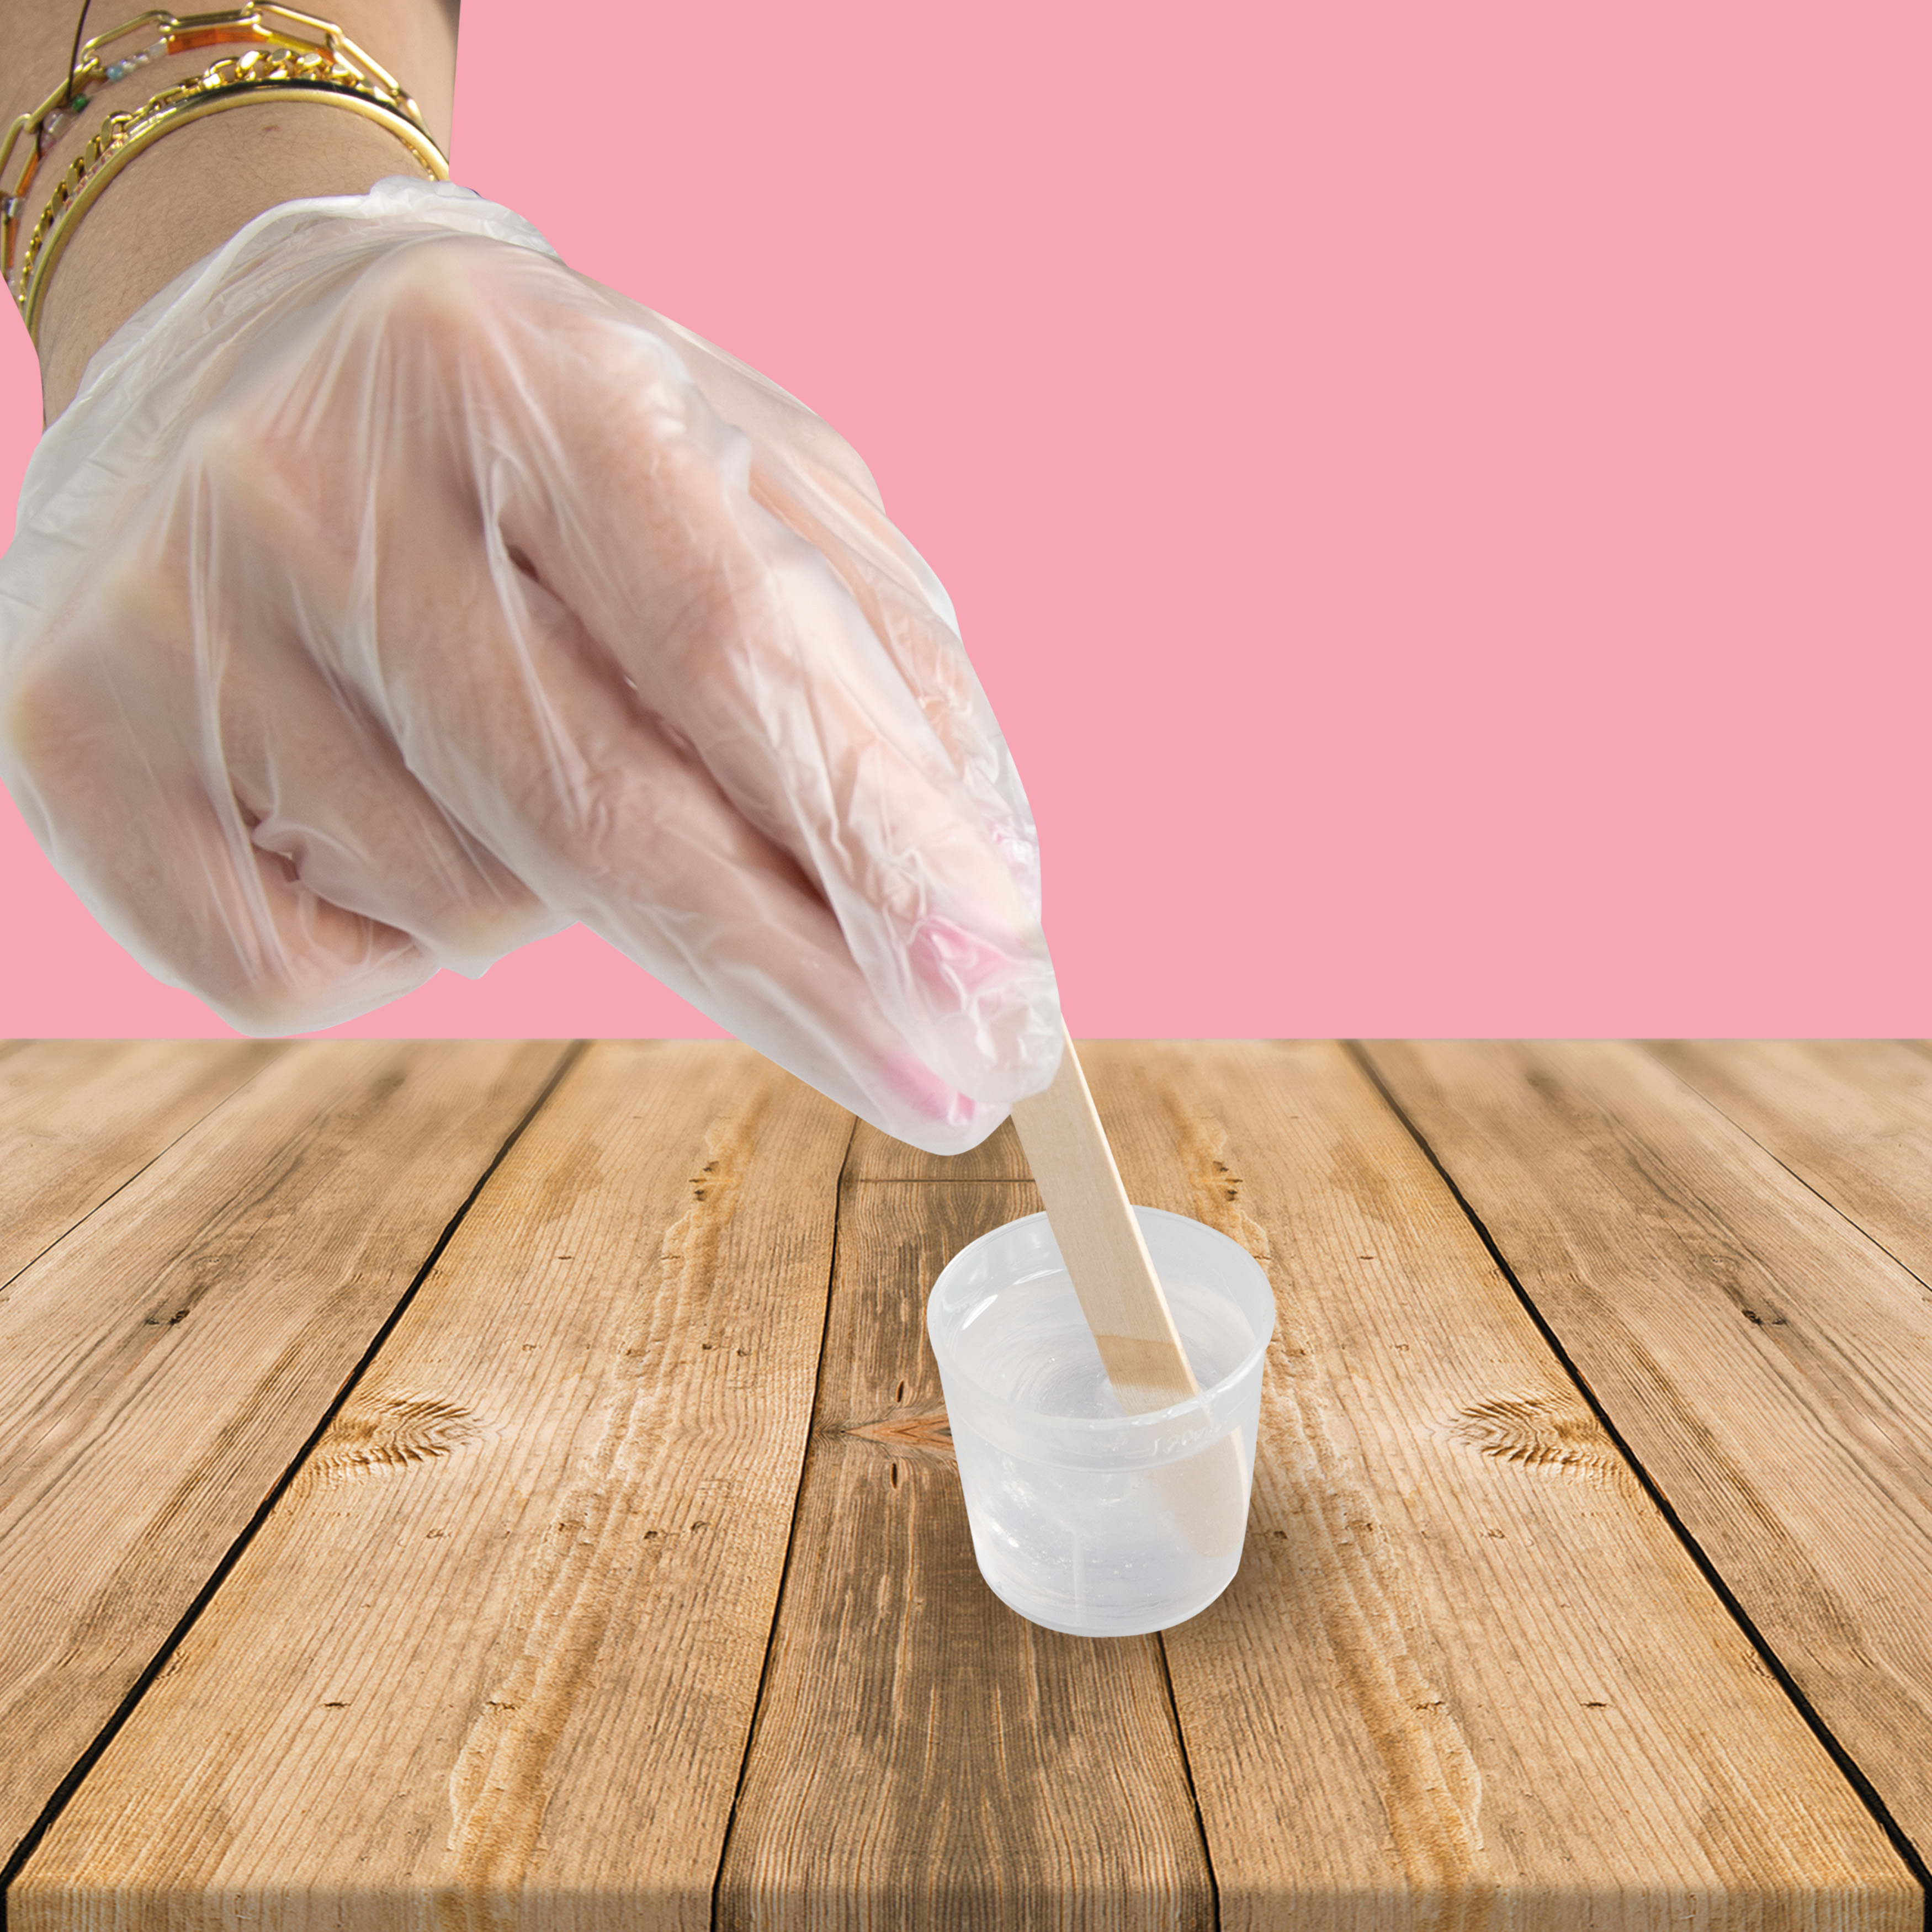
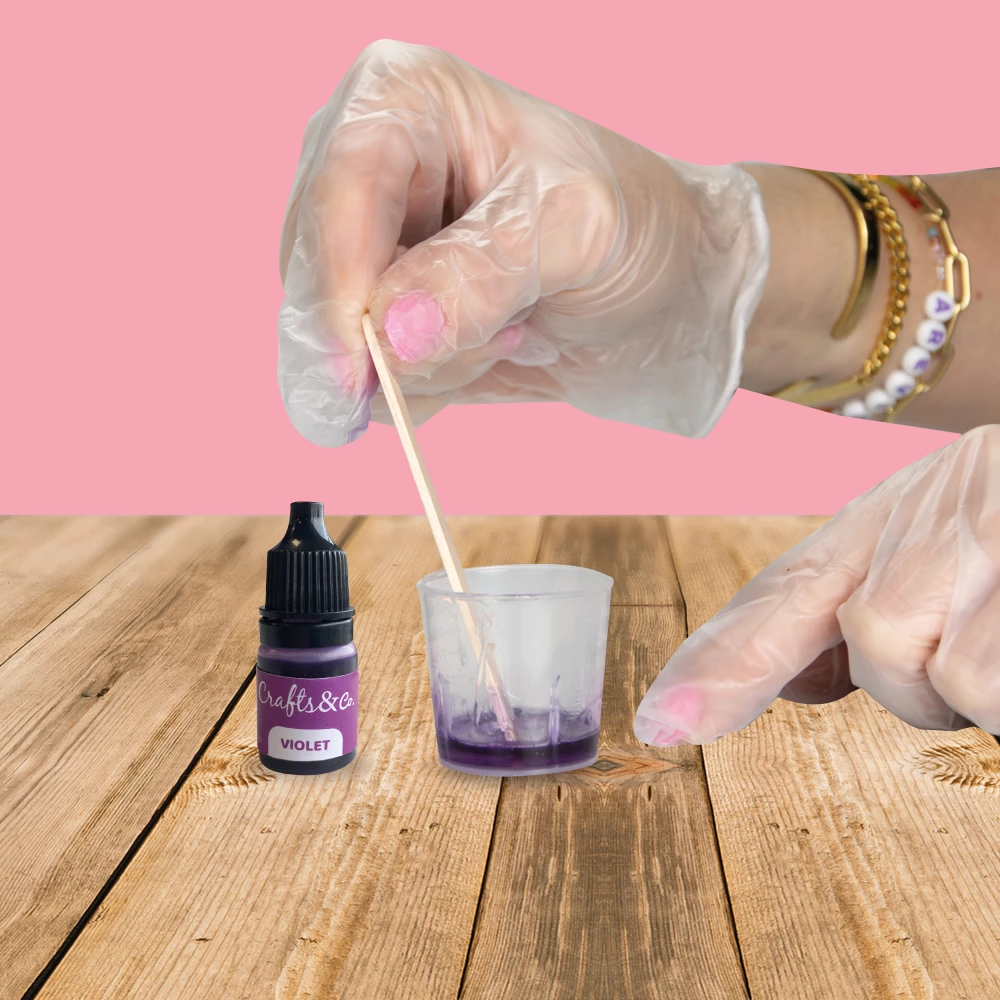
Stir the mixture gently and thoroughly until a clear unit forms without air bubbles.

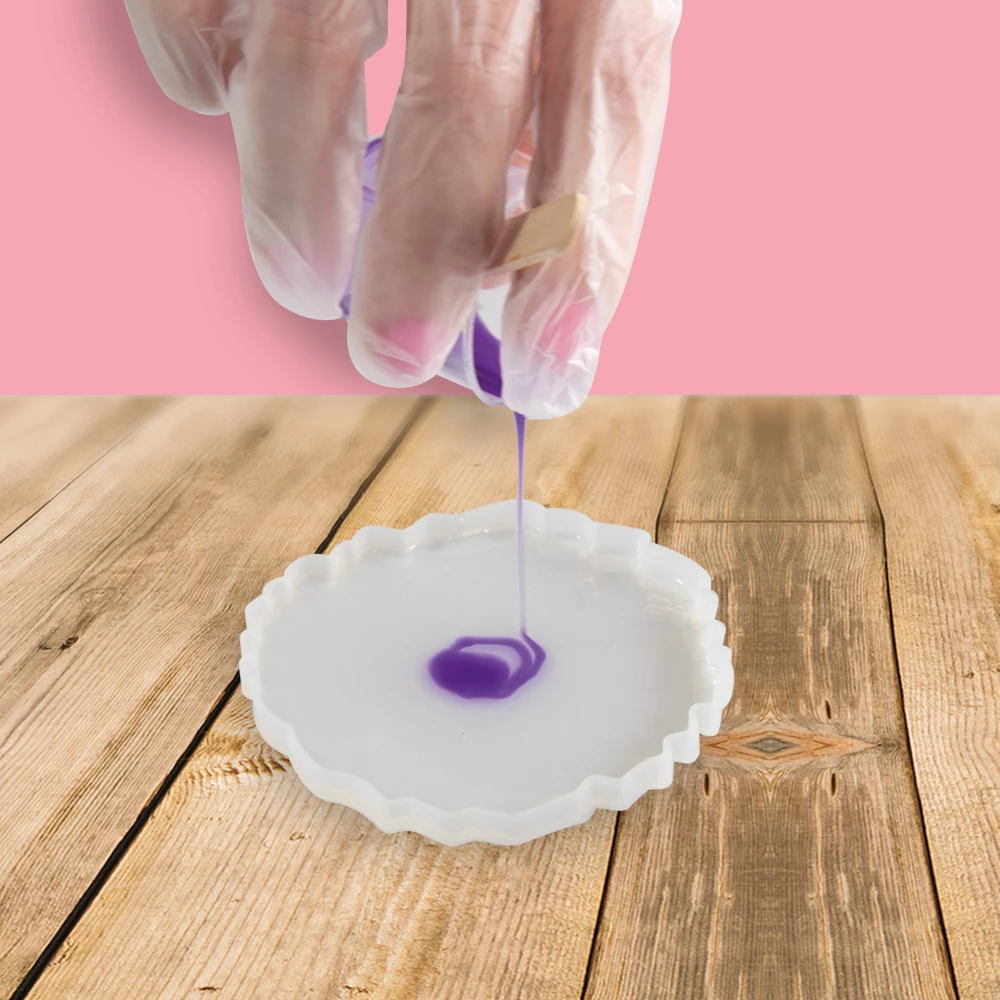
Add drops of pigment until a beautiful colour appears exactly the way you want it!

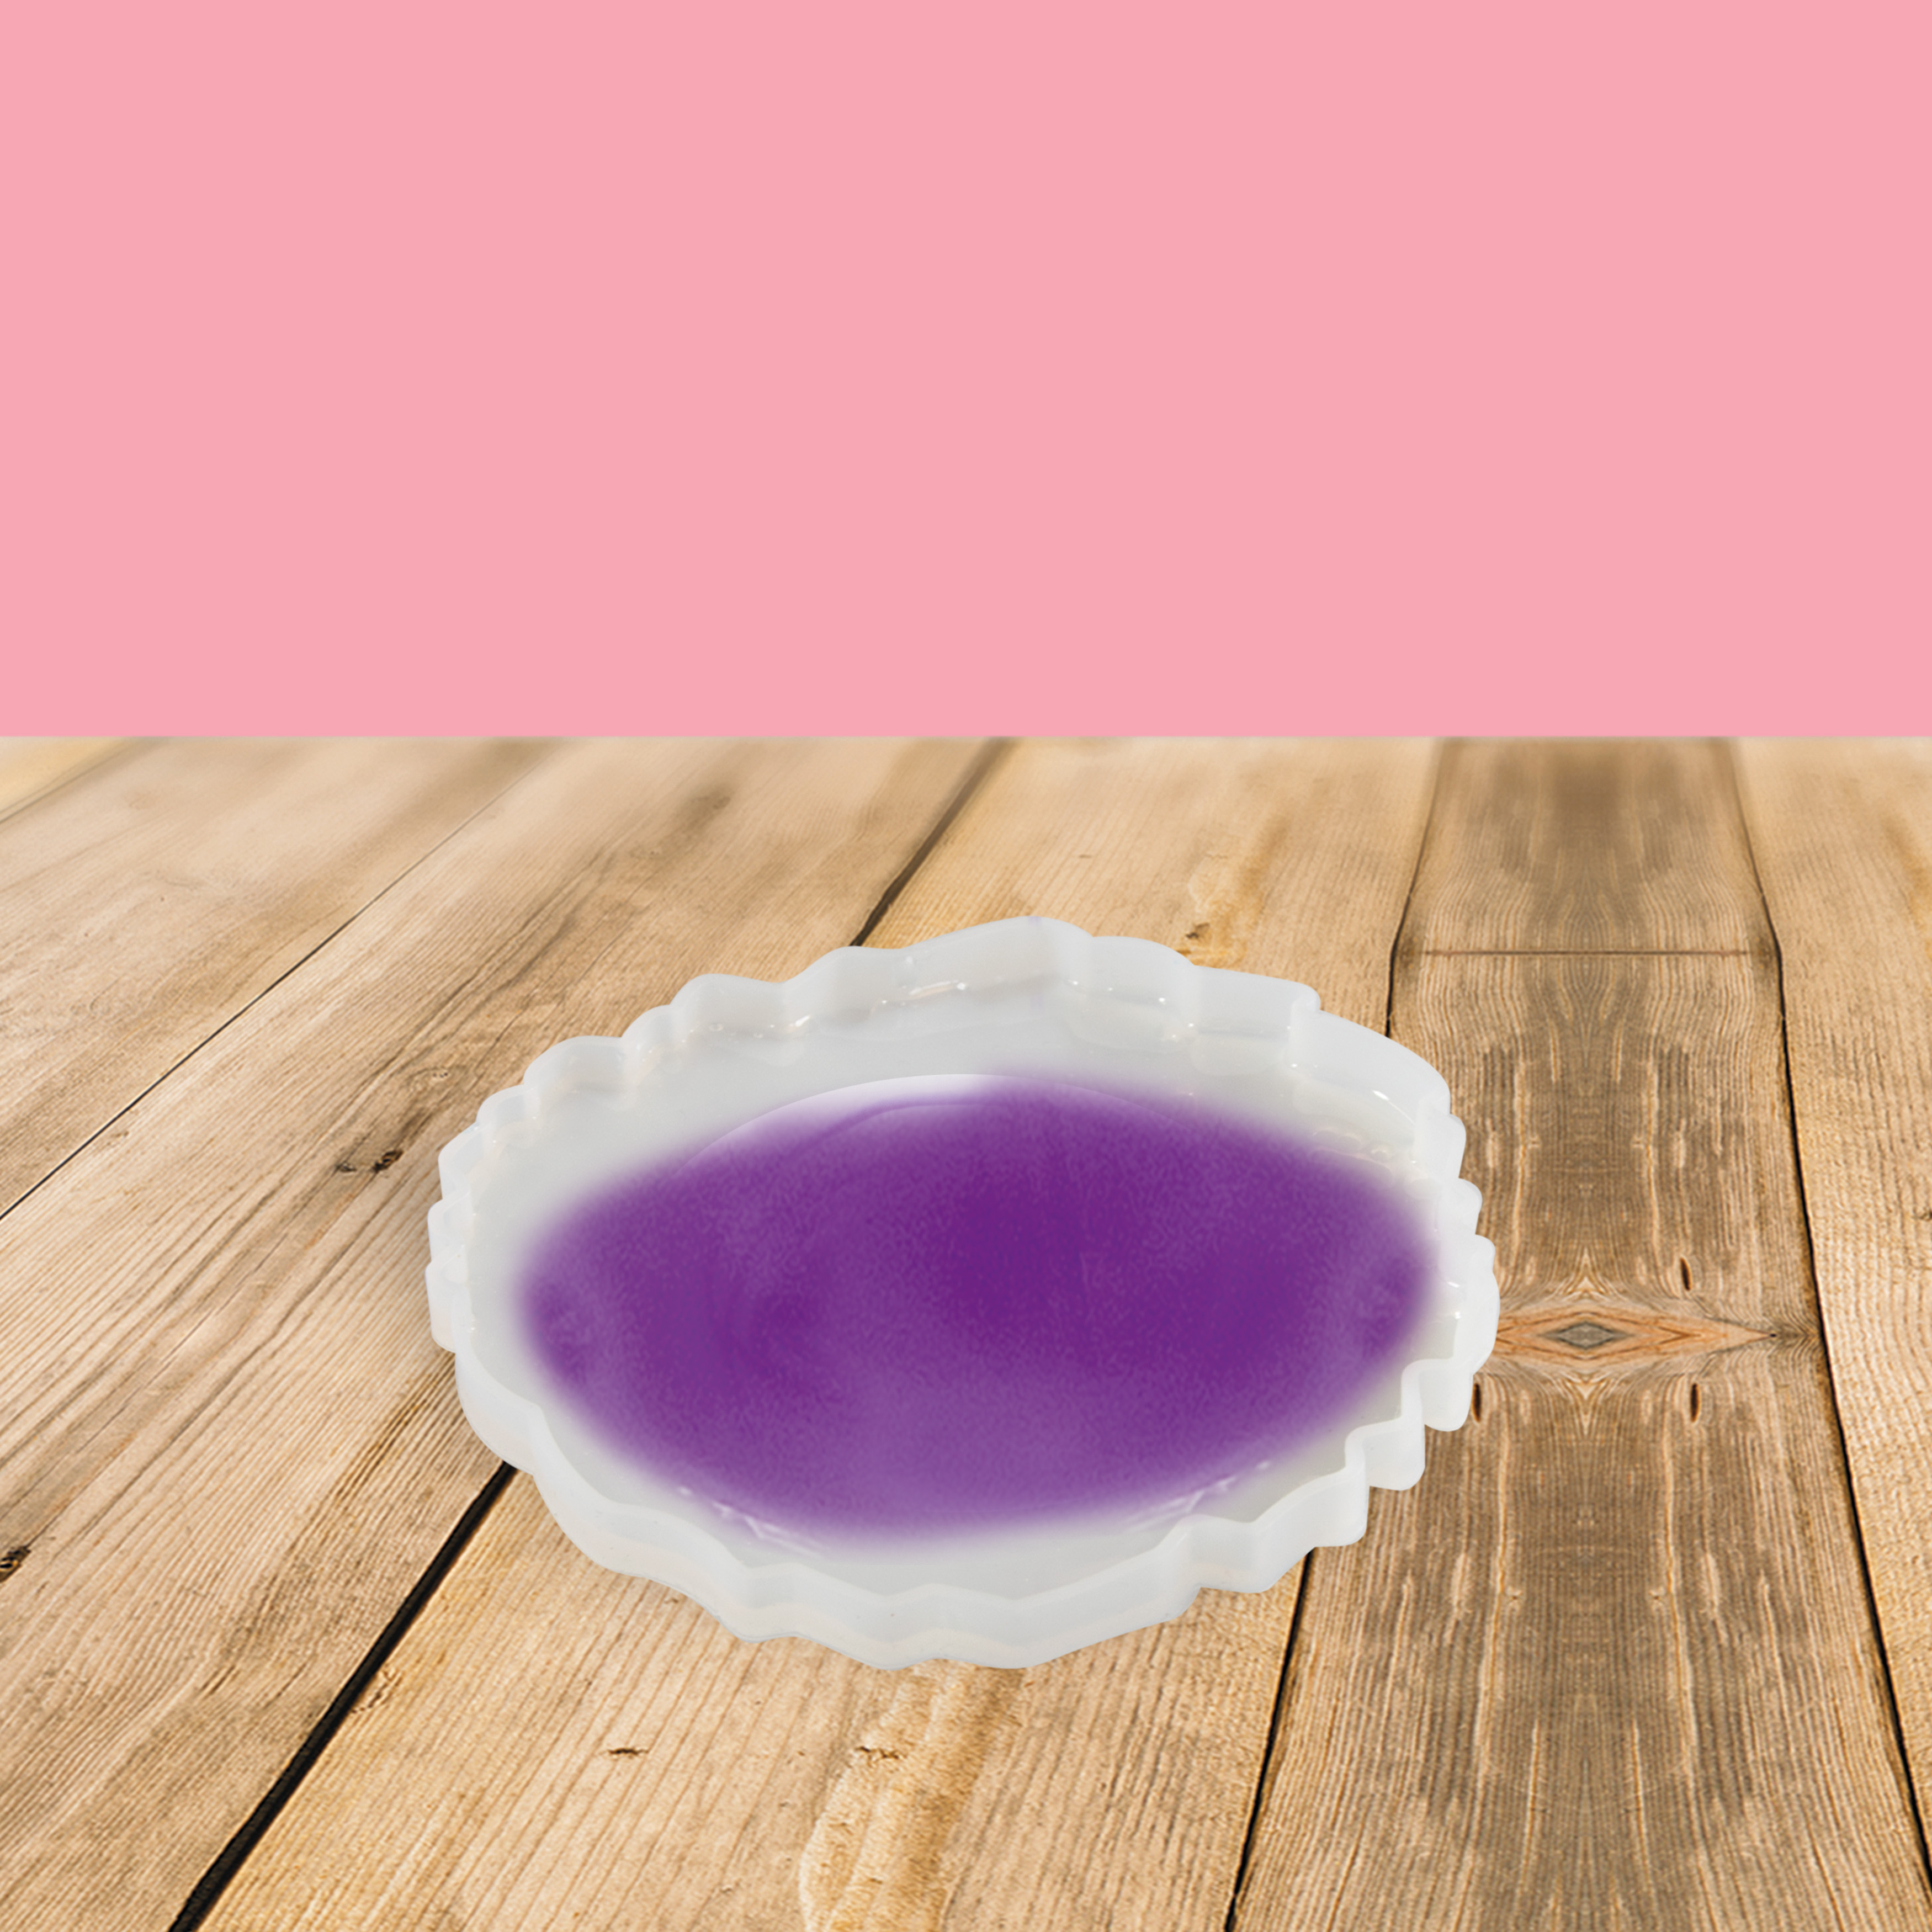
Slowly pour the mixture into the mould.
Again, be careful not to create any air bubbles.
Let the epoxy resin cure for 72 hours and be surprised by the result!
If you don't make your coasters too thick, you can make up to 4 coasters from this kit! Our recommendation is to pour 25 ml of mixture into the mold per coaster.
For successful results, you should mix both components 1 to 1. This means mixing 10 ml of resin with 10 ml of hardener.
You can prevent air bubbles with the following tips: stir the mixture slowly, pour the mixture slowly and from not too high in the mold.
After opening the bottle of resin and hardener, you can store it for 6 months. Place it in a dry and cool place.
Yes, an incorrect ratio of epoxy resin can cause irritation when touched. Use the gloves provided, and make sure the room where you will be tinkering is well ventilated!

Do you have a question about one of our products or about your order? Our team is ready to answer all your questions.
Our customer service is available from Monday to Friday between 09:00 and 17:30


"Had dit gekocht om met mijn oppaskindjes te maken. Echt heel leuk om te zien wat ze er allemaal van maken!"
Erna Sneeuws - 02-05-2023
 8,9
8,9
"Good experience"
Yolanda Capela Crespo - 25-04-2024
"Very good"
Vítor Rua - 23-04-2024


And receive updates by email from Crafts&Co.
Overschiestraat 63 - 5
1062 XD
Amsterdam
Our customer service is available from Monday to Friday between 09:00 and 17:30