-27%
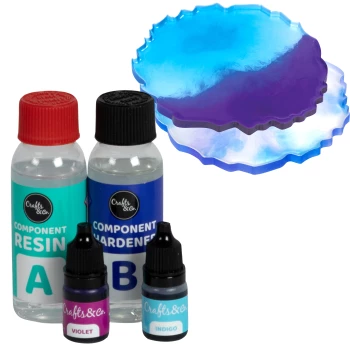
Epoxy Resin Coaster making kit
Fast and secure delivery
30-day money-back guarantee
 8,8/10
Want to learn to make your own candles? With our Candle Making Kit, you can easily make beautiful candles, perfect for a personalised gift or to decorate your own interior. Follow these simple steps and discover how to make your own candles step by step.
Watch our video where we walk you through the process of making your own candles.
To make your own candles, you don't need much stuff at all. If you use our Candle Making Kit, you probably already have everything you need.
Candle wax (300 g: 90% paraffin, 10% soy wax) - perfect for creating a sturdy candle
Candle wicks (4x) - for different candle shapes
Wooden sticks (4x) - for stabilising the wicks
Wick needle - to position the wick precisely
Candle dye (2x 3 g) - add colour to your candles
Small silicone cast - for making smaller candles
Large silicone cast - for larger candles
Pan
Hotplate
Measuring cup or kitchen scales
Bowl or pot for au bain-marie
Stirring spoon
Scissors
Follow these simple steps to make your own candles:
Gather all supplies such as a pan, hotplate and a measuring cup.
Choose your mould and weigh out the right amount of candle wax. For the small mould you will need 40 g of candle wax, for the large one 150 g.
Melt the wax au bain-marie on a low heat until the wax is completely melted. Keep stirring gently.
Add colouring and stir well. Test the colour by letting a drop of wax dry on a light surface.
Pierce a hole in the mould and insert the wick with the wick needle.
Stabilise the wick by bending it on the outside of the mould.
Place the wooden stick on top of the mould and pull the wick through the hole.
Carefully pour the melted candle wax into the mould, using a funnel for precision.
Make sure the wick is straight before the candle wax solidifies. Top up if necessary if a pit forms.
Let the candle cool for 2.5 hours before carefully removing the cast.
Cut the wick 1 cm above the candle.
Allow the candle to harden for at least 24 hours before use.

Start your candle-making adventure with the Candle Making Kit. Make 2 to 6 candles, play with the colour intensity and create a cosy atmosphere in your home effortlessly!
Exclusively available at Action
Want to make even more yourself or try other DIY projects? Then check out our other creative kits and blog tutorials and find out how to make even more magical creations.
 8,8
Fast and secure delivery
30-day money-back guarantee
"Foi boa, apesar de ter tido problemas com a morada"
Sara Marques - 30-09-2026
"Muy favorable"
Maria josé Jaime - 15-09-2026



And receive updates by email from Crafts&Co.

Overschiestraat 63 - 5
1062 XD
Amsterdam
Our customer service is available from Monday to Friday between 09:00 and 17:30